What Is Remote Desktop? How IT Teams Actually Use It to Operate and Support RDS at Scale
What is Remote Desktop in real RDS environments? Learn how IT teams use RDP daily to operate, secure and monitor Remote Desktop Services at scale.
Would you like to see the site in a different language?
RDS TOOLS BLOG
Remote Desktop access allows you to control a computer from another device, making it a powerful tool for IT professionals, businesses and remote workers. Whether you are an MSP or IT agent, need to access your work PC from home or provide remote troubleshooting support to clients near and far, setting up Remote Desktop is essential. But beyond the basic configuration, it remains important to ensure your setup is both secure and optimised for long-term performance.
In this article, we walk through the steps to set up Remote Desktop on Windows, macOS and Linux. Additionally, we both share tips ensuring a secure, efficient connection and regarding how RDS Tools can further secure and enhance your remote desktop experience by providing advanced security, monitoring and support features.
)
Here are three of the most common practical applications of RDS or similar remote desktop infrastructure:
Provide your staff or clients with access to their office computers from anywhere in the world. Whether working from home, travelling or accessing files or applications, Remote Desktop ensures users can always connect to your company’s or your clients’ work environment.
Troubleshoot and manage systems without IT teams being physically present. Remote Desktop tools allow your support staff to remotely access, fix and update systems in real-time, saving valuable time and reducing downtime for users.
Work remotely and use powerful desktop applications without needing physical access to a machine. Whether as an employee, freelance agent or business owner, Remote Desktop enables you and your clients to get the job done from any location, improving flexibility and productivity.
Such remote potential being at your fingertips, here are basic instructions for setup in Windows, macOS and Linux:
Access Windows settings to enable the remote desktop feature.
1. Open the Start Menu and select Settings .
2. In the Settings window, navigate to System and click on Remote Desktop .
3. Toggle the Remote Desktop switch to On .
4. When prompted, click Confirm to enable Remote Desktop on the system.
5. Take note of the PC Name displayed under "PC name"—this will be needed when connecting from another device.
6. You might also need to adjust your Power & Sleep settings to ensure that the PC doesn’t go to sleep when you are away.
Ensure the devices are on the same network or connected via VPN for secure, uninterrupted access. Check if both devices are on the same network:
1. On the host machine, open Command Prompt by pressing Win + R , typing cmd , and pressing Enter.
2. Type ipconfig and press Enter.
3. Look for the IPv4 Address under the network adapter section—this is the address you will use to connect from the client machine.
If the devices are on different networks (for example, if you're connecting from home to an office network), you will need to configure port forwarding TCP port 3389 on your router to allow external access to the host machine. However, it is all the more important to proceed with caution and apply strong security measures discussed below to avoid exposing your network to cyber threats.
Once Remote Desktop is enabled, you can connect from another computer or device. If necessary, follow the instructions below for connecting to the Windows machine from another computer using Remote Desktop.
Here is how to connect from a Windows machine:
1. Open the Remote Desktop Connection client by pressing Windows + R , typing mstsc , and pressing Enter. Alternatively, you can search for Remote Desktop in the Start Menu.
2. In the Remote Desktop Connection window, enter the PC Name or IP address of the remote computer. If you're connecting over a local network, the PC Name found in the system settings should suffice. For remote connections over the internet, use the IP address you found earlier.
3. Click Connect .
4. A login screen will appear, prompting you for the username and password of the remote machine.
5. Once authenticated, you will be connected to the host machine, where you can begin using it as if you were sitting right in front of it.
When using a macOS or Linux device to connect to the Windows machine, you will need to use a specific app such as Microsoft Remote Desktop for macOS or Remmina for Linux, nonetheless the overall steps are similar.
Download and configure the Remote Desktop client on macOS to facilitate seamless connection to Windows environments.
1. Download the Microsoft Remote Desktop app from the Mac App Store .
2. After installation, open the app and click Add PC to set up a new connection.
3. In the PC name field, enter the hostname or IP address of the Windows machine you want to connect to (this information should be provided by the user or system administrator).
4. Under User Account , enter the username and password of the Windows machine. You may also set up additional settings such as resolution , display preferences and audio settings to match your needs.
5. Click Add to save the connection.
You will need to enter the host machine’s IP or name and credentials to establish a secure connection.
To make the connection, open the Remote Desktop app again and click on the PC name you added.
You will then be prompted to enter the username and password associated with the Windows computer to establish the connection.
For Linux users, Remmina is a popular option. Install and set up the Remina client to connect to Windows-based remote desktops:
1. Install Remmina via your distribution's package manager (e.g., sudo apt install remmina for Ubuntu).
2. Launch Remmina and select RDP from the connection protocol dropdown.
3. In the Server field, enter the hostname or IP address of the remote Windows machine.
4. Enter the username and password of the Windows machine.
5. Customize other settings such as resolution, colour depth, and keyboard shortcuts if needed.
6. Click Connect to establish the RDP session.
Input the necessary details like hostname and username for RDP access:
Make sure you enter the correct
host IP
or
hostname
in the
Server
field, as this ensures a smooth connection.
For local networks, you can use the PC name, but for internet connections, use the IP address (with necessary port forwarding).
Should you experience any issues, read on. Here are some common issues and troubleshooting steps, ensuring you and your clients can always access your remote desktops without delays.
First, our tips for secure connections and avoiding such connection issues as unstable connections or authentication failures:
For a secure connection, ensure that both devices use encryption protocols to protect the data. Using Network Level Authentication (NLA) is highly recommended, as it provides a more secure login process, requiring users to authenticate before the remote session is established. If possible, avoid connecting over public Wi-Fi without a VPN to ensure the security of your session.
Double-check your username and password to ensure they match the remote computer's login credentials.
Ensure both devices are on the same network or connected through VPN. If the network connection is unstable, try restarting the router or switching to a wired connection.
Ensure the firewall on the host machine is set to allow RDP connections. You may need to manually configure the firewall settings if the default settings are blocking connections.
If the issue persists, try using a different RDP client or check the connection settings for potential misconfigurations.
While setting up Remote Desktop is relatively straightforward, implementing best practice will help ensure that your setup is both secure and reliable.
Enable network encryption set strong passwords and consider using multi-factor authentication (MFA) for an added layer of protection. Even if your Remote Desktop setup is only on a local network, it’s crucial to ensure that unauthorized users can't gain access.
For an optimised and secure remote desktop environment, ensure that you implement a combination of the following:
Make sure that Network Level Authentication (NLA) and Secure Socket Layer (SSL) Encryption is enabled. This ensures that all data transferred between the host and client machines remains protected.
Use complex passwords for both the host and remote accounts to prevent unauthorized access. Avoid using default or simple passwords.
Implementing MFA adds an additional layer of security by requiring an extra authentication method (such as a code sent to your phone) in addition to your regular login credentials. This is especially important when working with sensitive data or remote systems.
Make sure your firewall is properly configured to allow Remote Desktop connections while blocking malicious traffic. Ensure that only authorized IP addresses are able to connect, especially if your setup involves an internet connection.
For secure and seamless remote desktop access, configuring the firewall is essential:
Keeping your system and Remote Desktop software up-to-date is essential for preventing security vulnerabilities. Frequent updates ensure that you are protected from the latest threats.
Regularly update both your operating system and remote desktop software These updates often include critical security patches which prevent exploitation by malicious actors. Keeping everything up to date ensures the best possible protection against vulnerabilities and threats.
Setting up Remote Desktop is just the first step. For IT teams and businesses, ensuring security, performance and proactive management of your remote infrastructure is critical. This is where RDS Tools can make a significant difference in your Remote Desktop setup.
While basic RDP offers some security features, RDS Tools takes the security of your remote desktop environment to the next level. Amongst other features, Advanced Security from RDS Tools provides:
Restrict remote access based on geographical location, preventing unauthorized access from regions that don’t require access.
Protect your remote infrastructure from some of the most dangerous cyber threats by implementing real-time ransomware protection within your RDS environment.
Set up custom IP whitelists to ensure that only trusted devices and users can access your RDS or Citrix systems.
By integrating RDS Tools Advanced Security into your remote desktop infrastructure, you can ensure unauthorized access is minimized and your systems remain secure from evolving threats.
One of the biggest challenges for IT teams managing RDS setups is ensuring systems are always available and functioning optimally. With Server Monitoring from RDS Tools, you can:
Track individual user sessions, performance metrics and active connections to ensure that systems are running efficiently.
Get instant notifications of potential system failures, high CPU or memory usage and other critical issues, so you can address them before they cause downtime.
RDS Tools provides insights into how resources are being utilized, allowing administrators to optimize server performance, reduce resource bottlenecks and improve the user experience.
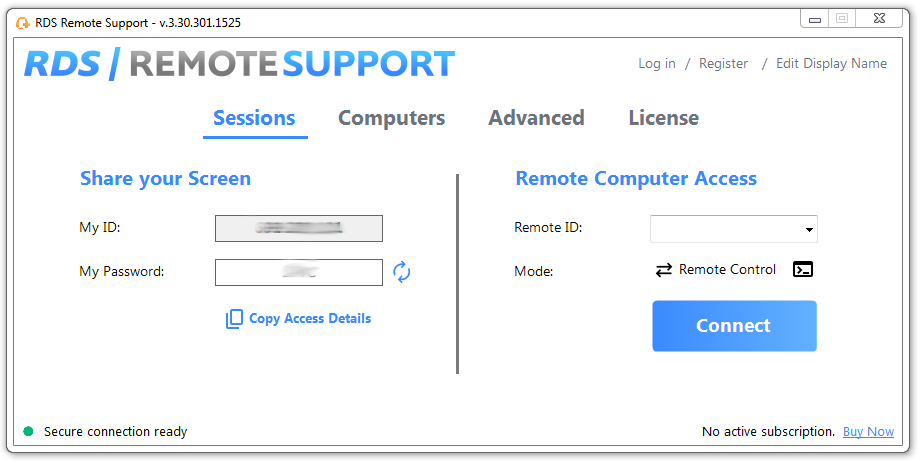
RDS Tools Remote Support is an essential tool for IT teams, enabling them to troubleshoot and resolve issues without being physically present. Whether it is in user support, training or system troubleshooting, RDS Tools allows IT staff to:
Remote Support lets you connect to devices and resolve issues in real-time, reducing downtime for users and enhancing overall productivity.
Ensure remote environments are always up-to-date and secure, implement farm or network-wide changes and configurations, access and fix remote devices with or without their user present. All this happens over a secure encrypted connection with no personal data exchanges.
Share screens for training and demonstration purposes, record sessions for more than compliance - as a means of skills-sharing - and collaborate on fixing complex issues across teams and more.
Setting up Remote Desktop is an essential skill for anyone working or needing to access a computer remotely. While basic RDP setups offer the bare essentials, enhancing your infrastructure with RDS Tools brings powerful features such as Advanced Security , Server Monitoring and Remote Support making your system more secure, scalable and efficient.
By following the steps outlined above and integrating RDS Tools, you can create a secure, high-performing remote desktop environment for any size business.
Why wait to explore RDS Tools to boost your remote access security, optimise performance and provide seamless IT support. Visit our website today to get started with our advanced solutions and take your remote desktop setup to the next level!
RDS Remote Support Free Trial
Cost-effective Attended and Unattended Remote Assistance from/to macOS and Windows PCs.

Your RDS Tools Team
Simple, Robust and Affordable Remote Access Solutions for IT professionals.
The Ultimate Toolbox to better Serve your Microsoft RDS Clients.
 Get in touch
Related Posts
)
What is Remote Desktop in real RDS environments? Learn how IT teams use RDP daily to operate, secure and monitor Remote Desktop Services at scale.
)
Secure Remote Desktop Services on Windows Server 2025 with a comprehensive checklist covering authentication, access control, encryption, session security and RDS monitoring best practice
)
Learn how to configure a VPN for Remote Desktop on Windows, macOS and Linux. Secure RDP access, avoid exposed ports and protect remote connections with an encrypted VPN tunnel and RDS Tools software.
)
Learn how IT agents can deliver secure remote support with RDS-Tools Remote Support and get a copy-paste script to explain desktop sharing to end-users.
